FOOD FOR THOUGHT...

"Good chefs, like artists, are visionaries. You have to have a vision of the taste, the look, the smell of your masterpiece; you hold it in your mind and make it materialize."

Onid Jatteri

Showing posts with label dehydrator. Show all posts

Sunday, May 23, 2010

Strawberry Macaroons!!

Browsing the web for raw recipes can get to be overwhelming - there is so much info out there now, and a plethora of recipes and concepts of raw. But there a few sites I can count on.

One is Raw-mazing, with Susan Powers. Her concepts are sane, her recipes delicious - ranging from simple to elegant - and I always come away from her site feeling good! What more could a raw foodie ask?

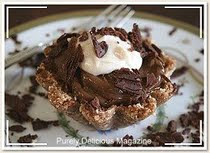
I choose her CHOCOLATE COVERED STRAWBERRY MACAROONS to share at our last Raw Potluck. They were a definate hit, not a crumb left. Easy to make, too!


STRAWBERRY MACAROONS

Dice: fresh strawberries to measure 1 c. - set aside.

Mix in bowl: 1 c. almond flour/meal
1/4 c. raw maple syrup
1/4 c. agave
1/4 c. coconut butter, softened
pinch sea salt
2 c. dried unsweetened coconut, fine shred

Stir in berries. Shape cookies with teaspoon onto fine mesh screen. Dehydrate at 140 degrees 30 minutes then at 116 degrees for 3 - 5 hours. I like chewy macaroons, so I just did about 3 hours. They firm up as they cool, too, so take that into account. While warm from drying, dip in chocolate. Place on waxed paper on try, chill until chocolate sets. Serve on platter sprinkled with more shredded coconut, keeps chocolate from sticking.

CHOCOLATE DIP

Whisk together: 1/2 c. raw cacao powder (or carob, or mixture of both; carob tames the
intense cacao)
1/2 c. agave
1/4 c. cacao butter, melted

Make the chocolate just before ready to dip cookies - if it is made ahead, it can stiffen. Warm gently, or add a bit more agave. (Do NOT add water, it sets up chocolate.)


This recipe made two platters the size as seen in the photo. I left some undipped for those who don't care for chocolate. Philistines.

These are worthy of any fancy dinner or afternoon ladies tea!

Friday, October 23, 2009

Onion Bread

Staying away from yeast breads is important for my health. Mostly because I love them SOOOO much that I totally lose focus at the first bite of buttered yeasty chewy yum, and will easily go through half a loaf of fresh-out-of-the oven bread. And to make it even more difficult, I LOVE to BAKE BREAD!!


While browsing through various raw recipe sites, I kept seeing references to an Onion Bread that most contributors seemed to think was the bee's knee's, the best thing in the raw bread world. So I finally threw the ingredients in the processor, waited patiently for it do it's thing in the dehydrator, and took a bite.


Whoa nelly. This is GOOD STUFF!


Here's my version of a super lunch - tomato, avocado, and alfalfa sprouts in an onion bread sandwich spread with a bit of almondaise, some curried cauliflower, a spoonful raw kraut salad, some marinated/dehydrated mushrooms - and apple walnut cookies to snack on a bit later.
I did a few tweaks, after taking notes on various versions. Here's my
ONION BREAD
In processor, finely dice 1 large sweet onion - about 1 1/4c.
Put in a bowl with: 1 c. flax seed, ground (measure BEFORE grinding)
1 c. raw sunflower seeds, ground ( " ")
1/4 c. fermented soy sauce, ie Kikomans
1/4 c. water
1/8 c. -1/4 c. olive oil (too much oil makes it crumbly)
1/2 large sweet onion, THINLY sliced
Mix thoroughly. Spread on teflex sheets (it made two sheets for my round dehydrator) about 1/4" thin. Helps to wet your hands as you spread and pat it out. Dry about 8 hours at 115 degrees (overnight works). Flip off the teflex sheets onto dehydrator racks, dry additional 3-4 hours, or until it suits the texture you like.
These are pliable but mostly dry; they can be dried totally crisp, if desired.
I cut them into wedges with kitchen scissors while still warm.
The only problem I ran into with them - I kept eating samples while testing for dryness. REALLY good flavor, and while still warm - devine!
I like this bread way too much, so I packaged wedges wrapped in pairs, for sandwiches, and tucked them into a ziplock bag in the fridge. I understand they freeze well, too. I'll try that if I still have some left at the end of the week....

Monday, October 19, 2009

Sunny Patties

I've been looking at "burger patty" recipes, planning on adding a little variety to the menu plus another "grab 'n go" food. This one, from "Dining in the Raw", was an inexpensive starter. Plus, I had everything on hand - that counts - a LOT!

SUNNY PATTIES
("Sunburgers" in the recipe book - I don't like the "burger" label when it isn't real meat - call me eccentric)

In food processor with"S" blade:
1 cup sunflower seeds (soak a couple hours and shake dry)
1/2 c. carrot chunks
1/2 c. celery chunks
1/2 bunch green onions, sliced
1 red bell pepper, seeded and sliced
1/4 c. fresh basil
1/4 c. fresh parsley
fermented soy sauce to taste

Process to very fine dice. Form patties, place gently on fine mesh screen on dehydrator trays. Don't squash onto mesh, they'll stick. I dried them for about 6 hours, at 118 degrees, to get the texture I like. They can be dried completely crisp, if desired. Store airtight in fridge.

Chewy, tasty, very satisfying!

I ate the first one warm from the dryer, with a dollop of fresh marinara.

These are going on the "make again" list!

Monday, September 7, 2009

Apple Walnut cookies


There is a plethora of raw info and recipes out there in the ether. I've explored around, and came to the conclusion that I could easily spend the better part of each day going from link to link.


So in the interest of having a life beyond the computer, I decided to pick one site that I liked, work my way through what interests me in the way of info and recipes, then move to another. Right now I'm into Raw LouLou. She has a down-to-earth approach, her recipes aren't over the top (some raw gourmet recipes are only for the rich and famous and folks with a chef or nothing else to do with their life...) and everything I've made so far has been easy, yummy and worth the time.
Give her a visit, you'll enjoy this gal in France! Well-organized site, easy to find recipes.
http://rawloulou.blogspot.com/

Here's LouLou's four-ingredient Apple Walnut cookies: (which came to her via Earthmother at In the Raw...see side bar)


Soak one cup of walnuts for several hours. In a blender (perferably a Vita-Mix) or processor, process 3-5 apples depending on size (cored and cut in chunks - she says apple pulp, which may mean she juiced apples and used the left-over pulp; I had to punt, and my method worked fine).
Add the rinsed and drained walnuts, and 1/8 c. raw honey. A good sprinkle of your favorite apple-buddy spices - cinnamon, nutmeg, apple pie blend, etc.
Process until small dice shows. Don't make total mush if you like some texture in your cookies.

Spoon (or if really dry make balls then squash them) onto dehyrator mesh screen. I used the screen for one batch, the teflex sheet for another. The teflex takes longer, and you need to take them off when almost done and finish on a rack anyway....
Dry at 115 degrees for about 8-10 hours - overnight was a good amount of time.

They should be crisp on the outside, chewy inside. Or however you like your cookies! With cold goat milk standing by...


These have got to be the easiest cookies I've ever made. Not only do they taste sensational, they are "healthy". Chewy yet some crunch from walnut pieces. A lovely blend of flavors to roll over the tastebuds.

The bonus: the cabin smelled like apple pie baking!

Saturday, September 5, 2009

Viva le Dehydrator!

One of my challenges in moving into the raw food realm has been bread. I'm addicted to bread, especially yeast breads.

Discovering how to make crackers and flatbreads by drying the "batter" in a food dehydrator has opened a whole new chapter in my raw foods notebook. Using sprouted grains, fresh vegies, herbs, healthy oils and seeds and nuts make these wonderful bread stand-ins infinately variable.
I'll still have my yeast bread days (sour dough is my next project), but these types of crackers and flatbreads are definately here to stay.

Here's a before and after look at a basic very simple cracker. A cup of sprouted wheat (an overnight soak and 8 hours of sprouting is all it takes) is blended throughly with 1/2 cup of water, 1/8 cup of olive oil and 1/2 tsp. sea salt. The Vita-Mix makes short work of this chore. The batter is poured onto one "fruit leather" sheet of the dehydrator, spread thinly (1/4") then dried (on the top tray of the stack of 5) at 115 degrees for about 8 or so hours - checking frequently towards the end. I like to flip the big cracker over while there are still some areas of moisture showing, then cut it into wedges with my kitchen scissors. I put the crackers directly on the rack for the last bit of drying needed.

You don't need a big fancy dehydrator to do this (although I would never turn one down if the dehydrator fairy dropped one by). The most important feature to have is the thermostat to adjust heat range. To maintain a "raw" status, 118 degrees is considered maximum.

This "professional" model of a commonly found dehydrator is totally cool. It came with two smaller-mesh screens for those itsy bitsy things you might dry (small berries that would fall through the regular rack holes?), and most importantly, two solid teflex sheets for the leathers and cracker thingys. Well under $70, it has been a great tool for my drying projects. And I can pick up more packages of trays if I need them; it will handle up to 12.

So here's the after. These are crispy, tasty, substantial enough to build layers of goodies on and eat out of hand, and totally raw. How wonderful is that?!

A smear of nut/veggie pate', a slice of tomato from the garden, and a couple friendly slices of avocado. One is a great snack. Two makes lunch!